OAL2014: Yellow Myrna and Owl Dress

I was off work last week and I got so much accomplished for the OAL2014. I finished both my dresses and I simply adore them both. I have learned many lessons. And I can’t wait to make another dress already! So, let’s talk about the first dress.

The pattern used was the official pattern for the OAL, which is Simplicity 1803. I made Bodice B for the owl dress and kept everything exactly the same for the pattern. I didn’t add a tie belt or tie end to this dress because I wanted to wear belts with this dress for a contrast.

This dress was started after the Marvel dress and it was not my first choice for fabric. However, when Joann’s did not have the Marvel print fabric then, I went with this owl print, which I loved. I thought I would put off making a dress from this fabric for about a month or two but, I couldn’t resist the fabric and decided to make them both simultaneously.

The dress was underlined with pink tulle that gives it great volume. The first lesson learned is to watch my iron setting because I definitely burned a piece of the pink tulle while make the bodice but, it was covered when I pressed the skirt seam upward. The underlining was an extra step but, it was so worth it. I would not love this dress as much if it didn’t have the underlining.

The bodice was the most intense part of the dressmaking. I thought the princess seams would be a problem but LLADYBIRD explained it so wonderfully that they turned out absolutely beautiful. Also, I loved her way of making darts and my back darts are just gorgeous. I don’t think I would have been able to have such great success with the bodice if it weren’t for LLADYBIRD. I kept the bodice sleeveless because I like to wear cardigans with my dresses the majority of the time and I don’t like the added bulk of sleeves. Adding the bias tape was no biggy. It could have been a bit neater but, I still like how it turned out. I don’t really like working armholes because it is such a small area to work with and you have to be extra careful. I was praying the entire time. Since the bodice was the main part I needed help with I decided to finish the dresses by simply following the pattern.

The skirt portion went by relatively smoothly. My threads did snap while doing the gathers for my skirt but, once I tried it again everything was cool. I must agree with LLADYBIRD about the pockets. They are in a kinda weird spot but, I’m not really dwelling on it. I did a narrow hem and made sure to take my time and it came out so neat.

Now, let’s talk about this zipper. I really wanted to finish my dress but, I was wary of inserting a lapped zipper. Well, I found that I built it up in my mind because it was no biggy. I referred to my book Teach Yourself Visually Sewing, looked at YouTube videos, and read the pattern instructions. I prayed and started the process and I love it!! I tried to make sure the zipper matched but, I see that with a lapped zipper it doesn’t really matter because it is covered. I did add the hook and eye above the zipper but, I can’t reach it by myself so, I usually leave it undone.

IMG_0376[1] IMG_0377[1] IMG_0379[1]


I don’t own a serger so, I used pinking shears for most of my seams except the facing. I used the zig zag stitch on the edge of the interfacing. I was battling with my machine because my zig zag stitch would not do proper zig zags. I took it apart, cleaned it out, and changed the needle but, it still wasn’t working. I finally changed the tension and it worked like a charm.

Let’s talk about the cardigan. This is Myrna by Andi Satterlund of Untangling Knots. It was a very simple knit and the fit is perfect. I do feel the buttons are too small and I may change them out for larger buttons at a later date. The cardigan pops free from the buttons and doesn’t really stay closed securely. I am not rushing to change out the buttons because I very rarely wear my cardigans completely closed. They are usually open most of the time. The yarn is my favorite part of the cardigan. The color is perfect!! The yellow has orange undertones. And the yellow is so vivid. The yarn feels absolutely amazing and it is very lightweight despite it being wool. This was a very quick knit and I finished it in about a week.  The yarn is Miss Bab’s Yowza in Squash Blossom. I used the suggested Size 8 needles because I did get gauge with it. The gauge was actually an errata but, I still like the fit and my measurements weren’t off according to the schematics so, the errata was not a big problem when it came to my cardigan.

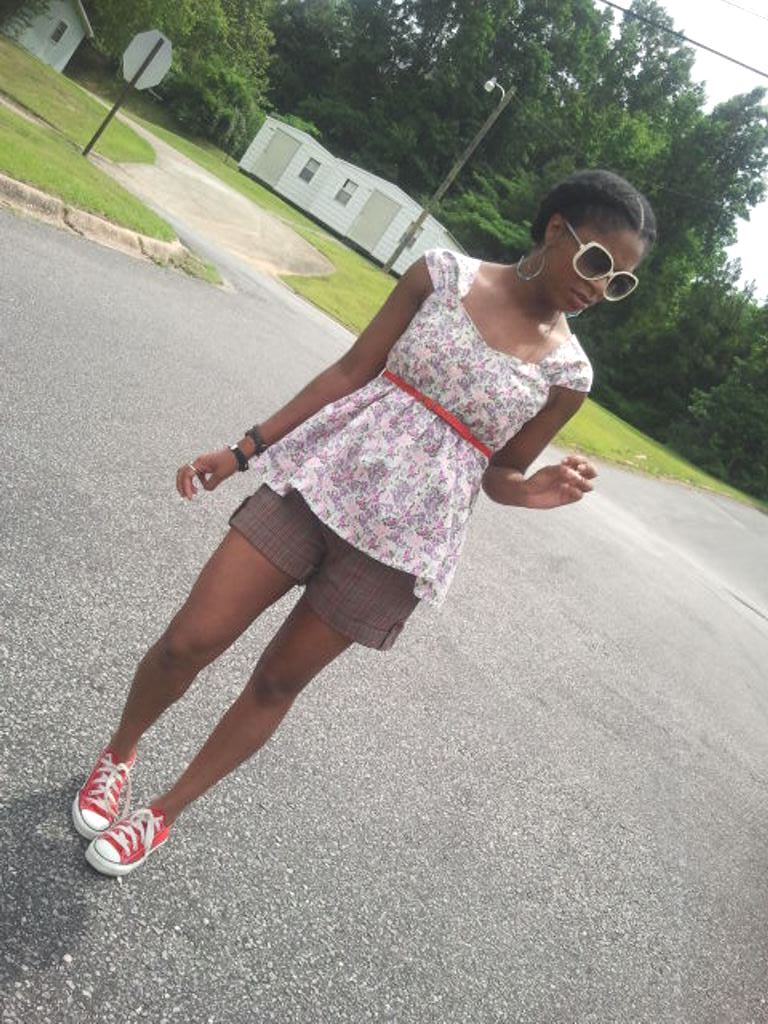
Hopefully, I covered everything about this dress. So, here are the pictures of the complete outfit…


IMG_0389[1] IMG_0390[1] IMG_0391[1] IMG_0392[1] IMG_0393[1]


OAL2014: Finished Myrna, Cutting, and Underlining the Dress

Last Thursday, I finished my Myrna cardigan and actually wore it this past Sunday to church. I probably won’t wear it again until my dress is finished. I don’t want to wear it out. Check out the pic below of the finished cardigan. Let me tell you, it was HOT this past Sunday yet, this was the perfect lightweight cardigan. Since this cardigan worked up so fast, I actually started another Myrna using Knit Picks Wool of the Andes in whirlpool yesterday. I’ll talk about that later on in this post.

??????? IMG_0269[1]

I started cutting for my dress this past Friday. To ensure accuracy, I took my precious time about it. I finished the cutting for everything last night. I am definitely moving at a snail’s pace.

IMG_0271[1]IMG_0277[1]

I really debated with myself on if I should add underlining. I wanted underlining to give the garment a better structure. Also, this would make the dress fit seamlessly into my wardrobe for the Fall and Winter. After much debate, I decided to go through with the underlining. At the end of the day, I was just being lazy and I figured that I might as well go through with it. Last night, I started basting my pieces. I used LLADYBIRD’s tutorial for underlining and I really like how simple it is. The process of basting the pieces was so relaxing to me. Or maybe I was just so done with the cutting that I enjoyed this next step. I sat at the dining room table and watched a few detective shows while basting.

IMG_0290[1]IMG_0289[1]

So, let’s talk about some changes I’m making to my outfits. Yes, outfits with an ‘s’. Remember when I told you all how I bought some owl fabric from Joann’s because I couldn’t find the Marvel print. Well, I did find the Marvel print later on but, I still kept staring at the owl print with the pretty pink lining I bought for it. It sat next to my sewing table and just tempted me. So, I made up my mind to make another dress! I will make these dresses simultaneously and hopefully they will be finished around the same time. I know this is a lot for a person that has never sewn a dress but, I can’t help myself. I like to challenge myself and I figured it’s definitely possible.

For the Marvel dress I plan on making Bodice A with the yoke, which isn’t everyone’s cup of tea but, I adore it. For the Owl dress I plan on making Bodice B, which has no yoke. Both dresses will be sleeveless. Since I wear cardigans the majority of the time with my dresses, I don’t like the added bulk of sleeves.

Both dresses will have underlining. The Marvel print dress will have a black satin lining and the Owl dress will have a pink rayon lining.

Initially, I had planned on wearing the yellow Myrna with my Marvel dress. Then, yesterday I randomly noticed that the blue from my current Myrna matched Captain America perfectly in the Marvel print! Then, I grabbed my yellow cardigan and put it next to the owl print and it looked absolutely perfect against it! So, I plan on wearing the blue Myrna with the Marvel dress and the yellow Myrna with the owl dress. Of course, down the line I will remix it either way. But, I prefer these combinations.

IMG_0284[1] IMG_0286[1]

I plan on cutting for the owl dress sometime this week. Next week, I am off work so I hope to get quite a bit done. I’ll keep you posted.

OAN: I’ll be leaving for graduate school in North Carolina soon and I can’t believe I am making dresses and moving at the same time. I’m a busy bee. This has really been the year for moving. I for one am sick of the moving process but, I look forward to the relocating process.


WIP: Myrna

I am making headway with my Myrna cardigan. I finished the body last night and I am about to start on the sleeves. This project works up super fast. I plan on finishing it in the next day or two. And since it is such a quick and fun knit I have already ordered yarn to make another in turquoise.

I really look forward to wearing this. The color is just beautiful. And I love the eyelets surrounding the body and the keyhole in the back.

IMG_0252[1] IMG_0253[1]

I’ll keep you posted.

Finished: Shirt (Butterick b5653)

IMG_0177[1]

And it is done! Well, you all know about my previous issues with trying to make this shirt. I learned many, many lessons. Also, I have to say a HUGE thank you to everyone who chimed in and offered advice and support during my first disastrous attempt.

On Friday night, I immediately went home and got back to work on this shirt. I fixed the gathers on the front of the sleeves and pretty much started from scratch for the sewing portion. And it worked out beautifully. I adore this top and actually wore it the next day to lunch and shopping. I received a compliment from the hostess on the shirt. I wanted to say Thank you. I made it. But, I just settled for Thank you 😉

I think I did alright with my underlining. It could have been neater but, I am pleased with it nonetheless. I have to re-do my slip stitches  because I think I rushed the process during the finishing and they weren’t that neat. So, I am going to mend that at a later date.

Further Details:

Pattern – Butterick b5653

Version – Version D with Version C’s shorter bottom. No trim added.

Fabric – from Wal-Mart at $1.50 per yard

Size – XS

??????? ??????? ??????? ???????

OAN: We start marking and cutting for the OAL2014 today! Why did I not know that pattern envelopes come in different sizes? I am such a newbie to this. So, I have the wrong size for my dress (size 14 – 20) and I need the Size 4. After work, I plan on making a trip to pick up the correct size pattern. Welp, that’s all I have to say about that.


I tried to sew a shirt…

Last night, I decided to try to follow a pattern (Butterick b5653) to make a shirt. It ended in disaster and was definitely a “Gordon Gartrelle” original. So, let me talk about my many errors…

1. Notches. When cutting, I forgot to add the notches. I remember vividly reading and watching videos on the importance of the notches but, I still forgot. So, I marked the space where the notches were supposed to go so, I could remember.

2. The layout for cutting is important. I decided to just cut the fabric and completely disregarded the layout. Of course, I knew the layout was important but, I figured I had 2 yards of fabric so, I had enough fabric. Wrong! When it came to cutting the lower front and lower back, I did not have enough fabric. So, instead of the longer version D I had to go with the shorter Version C.

3. When it came to adding the underlining to the upper lining, disaster reigned. Somehow, I grabbed portions from the bottom and actually sewed it to my seam at the top. Needless to say, the top was completely ill fitting.

4. What is understitching? I thought I completely read through the instructions but, I noticed that it told me to do that. I read up on it but, I think I’m going to check out a video for further clarification.

5. The fit of the garment was simply horrible. The right sleeve was so tight I could barely get my arm through. The bottom was not even so, one side was higher than the other.

6. I think I did pretty well on my gathers for the sleeves but, they can be evened up a bit.

7. I need to find a more efficient way of making sure my darts are lined together. However, I think I did alright for a first time.

So, after I noticed the mistakes, I ripped back quite a few seams. This was around 1:00 AM this morning. By this time, I was frustrated  and decided to call it a night. Well, this morning I tried on the top and it actually wasn’t that bad once the seams were ripped back. So tonight, I plan on giving this another go.

I felt like I wasted my time and materials but, then I started thinking that the mistakes were a good thing. The entire purpose of trying to make this top was to get a feel for a written pattern before I start my dress for the OAL2014. So, looking back I realized that I can learn from these mistakes and hopefully avoid them on my future projects.

I am learning that sewing takes patience.

Check out the pics of the garment after I ripped back the seams in those problem areas. I plan on trying to save this top tonight.

IMG_0156[1] IMG_0159[1]

Finished Object: Pink Hat

I finished this hat on my lunch break today. I previously made it last year for a guy (never blogged) and I always wanted to make another for myself in pink. Well, this was another filler project before I started my Myrna cardigan. I found myself putting this on the back burner once my yarn arrived for my cardigan so, I made it a goal to finish it today.

There is not much to say about this project. I followed the pattern exactly as printed from the pamphlet Celebrity Slouchy Beanies by Lisa Gentry.

Details:

Yarn – Red Heart Super Saver

Color – Shocking Pink

Needles – Size 6 (4 mm) and Size 8 (5 mm)

Size – Small/Medium

IMG_0148[1] IMG_0151[1] IMG_0150[1]

OAL2014: Getting Prepped

Well, the Outfit Along officially started this past Sunday.I finally have all my materials and I am ready to get started.

I ordered my yarn from Miss Bab’s. It is Yowza Whatta Skein. I was hesitant to order because I thought that it would take about a week for the yarn to arrive. But, it actually arrived on Monday and I had just placed the order on Friday. I did not want to settle with this yarn because I was drawn to this yellow as soon as I saw it. It is Squash Blossom and it is absolutely perfect. The yellow is so beautiful and they did a great job with this hand painted yarn. And the most amazing thing is that you get 560 yards per skein! So, I only needed one skein for my cardigan. I will be making the XS and it only requires 440 yards. I already have my eyes on some other colors that I want to order from them.

Today, I did checked my gauge and it was perfect with the size 8 needles. Tonight, I plan on casting on…

IMG_0131[1]

Now, let’s talk about the fabric. As mentioned previously, I really wanted a comic print fabric. Initially, I had planned on ordering the yarn. But, with the date for the OAL looming over my head, I decided to go to Joann’s and pick up the fabric. They only had the Spiderman print fabric, which I wasn’t too keen on. I like Spiderman but, I didn’t want a dress with only him on it. Plus, it didn’t match my yarn. So, I wandered around the store for over an hour and decided on a beautiful owl print fabric since I love owls. I also picked up some pink lining. I was able to get the Simplicity 1803 pattern and my notions from Joann’s.

Well, the next day I stopped by Wal-Mart to pick up some pinking shears. And while in there I decided to browse their fabrics. Lo and behold, they had the Marvel print! I tried to talk myself out of it but, I picked it up because this was my preferred choice over the owl print.

That Saturday, I pre-washed my fabric on the regular cold cycle and put it in the dryer with no softener.

Yesterday, I read Lauren’s post on choosing fabric and the proper size for the garment. According to her instructions, I will be making the Size 4. She suggested referring to the measurements printed on the pattern pieces instead of the back of the envelope. I have a bust of 32 and a waist of 25. This will give me the recommended ease and hopefully it will fit beautifully. I also read her post on adding under linings, which seemed simple enough. I am still debating if I will add lining. I mean, I could just wear a slip. But, lining would mean I never have to search for a slip. I haven’t made up my mind yet…

IMG_0123[1] IMG_0128[1]

 I’ll keep you posted on the OAL2014.

Finished Object: Mei-Mei in Red

After I completed my first Mei-Mei, I decided to quickly whip up another in red. I used the same hooks and gauge as I did for the previous Mei-Mei. I wanted a tighter fit so, I stayed with the tighter gauge.

Details:

Yarn – Hobby Lobby I Love This Yarn

Color – Fire Red

Hook – J (6.0 mm), I (5.5 mm), H (5.0 mm)

Level – Intermediate

IMG_0099[1] IMG_0103[1] IMG_0104[1] IMG_0105[1]

Me Made May ’14 – Final Roundup

Well, Me Made May ’14 is officially over! I enjoyed the challenge but, I am happy that it has run its course.

Day 29 (Thursday) – This was a very simple outfit. I just wore a vintage sky blue dress with my A to Z cardigan. As you can see from the photo, I just went for a quick bathroom selfie.

day 29

Day 30 (Friday) – This outfit is not new to you because I just posted about this finished Mei-Mei. I wore it with one of my favorite strapless dresses. Bolero’s work great with strapless dresses.day 30

Day 31 (Saturday) – Can you see my excitement about the last day of MMM? This is yet another Mei-Mei cardigan (I haven’t blogged about it yet) in red. I wore it with a navy strapless dress and my red chucks. day 31

OK, that concludes Me Made May for 2014.